세상사는 이야기 / 도움이 되었다면 배너 클릭 부탁드려요~ →→→

2018년 8월 29일 수요일

[Unity] ML-Agent 설치 및 실행

Unity Machine Learning Day 다녀오고 ML-Agent에 관심이 생겨 설치 과정을 정리해보았다.

ML-Agents
https://github.com/Unity-Technologies/ml-agents

Window 설치 문서
https://github.com/Unity-Technologies/ml-agents/blob/master/docs/Installation-Windows.md


이문서는 Window환경을 기준으로 했으며,
Anaconda를 사용하면 Python의 다양한 배포판에 대해 별도의 환경을 관리 할 수 ​​있다.

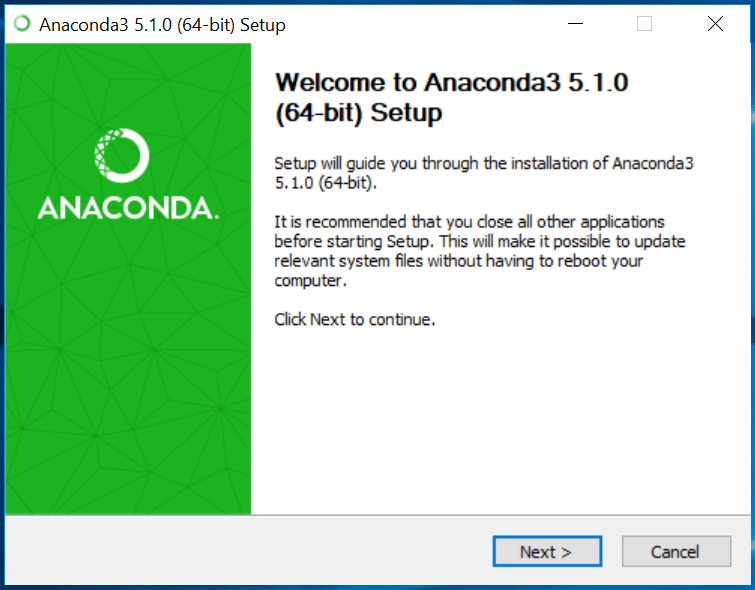
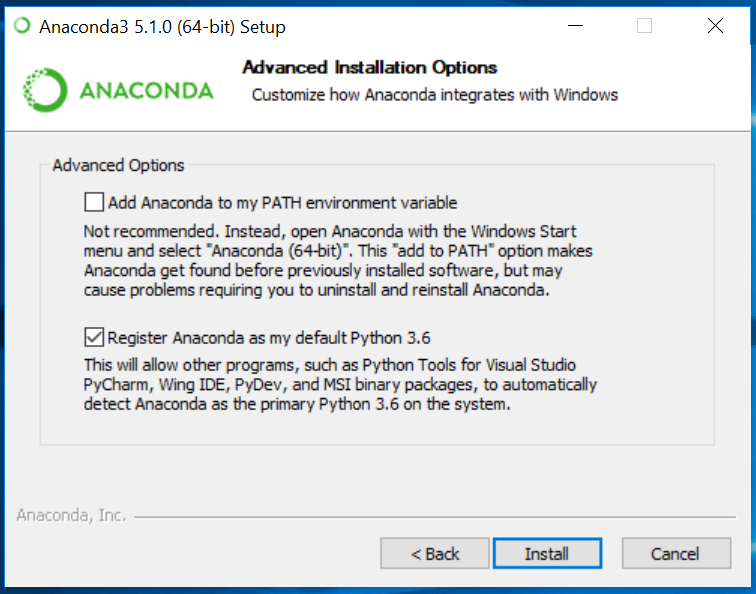
1. Anaconda 버전 5.1 설치


1-1. Regster Anaconda my default Pythone 3.6 선택


2. 환경변수를 등록

  1. “시스템 속성” -> “환경변수” 클릭
  2. “환경변수” -> “시스템 변수” -> “Path” 더블 클릭
  3. “환경 변수 편집” -> “새로 만들기“ 아래 4가지 추가
설치 폴더를 확인 (C:\ProgramData) 하고 추가해준다.
문서에서는 아래 폴더(UserProfile)로 되어있다.

C:\ProgramData\Anaconda3\Scripts
C:\ProgramData\Anaconda3\Scripts\conda.exe
C:\ProgramData\Anaconda3
C:\ProgramData\Anaconda3\python.exe
%UserProfile%\Anaconda3\Scripts
%UserProfile%\Anaconda3\Scripts\conda.exe
%UserProfile%\Anaconda3
%UserProfile%\Anaconda3\python.exe


3. Conda 환경 설정 및 ml-agents 활성화

  1. ML-Agents 툴킷을 사용할 Conda 환경을 생성한다. 생성한 Conda 환경에서 설치한 패키지는 Python이나 다른 환경의 다른 설치에는 영향을 미치지 않는다.
ML-Agents를 실행하려면 생성한 Conda 환경을 활성화 해야한다.
새로운 Conda 환경을 만들려면 Anaconda Prompt 창을 열고 다음 명령을 입력
    • conda create -n ml-agents python=3.6

2. ml-agents 활성화
    • activate ml-agents
3. tensorflow install
    • pip install tensorflow==1.7.1

4. ML-Agents Toolkit에서 사용하는 Python패키지 설치

- Git을 이용한 설치
  1.  필수 패키지 설치를 위해서는 Git을 설치( 다운로드 Git 설치 후 Anaconda Prompt 실행
    • 새창으로 시작할 경우 ml-agents를 활성화해야 함 : activate ml-agents
  2. ML-Agents Toolkit Github 저장소 Clone
    • git clone https://github.com/Unity-Technologies/ml-agents.git

- Git을 사용하지 않을 경우
  1. ml-agents-master.zip파일 다운로드(링크)
  2. C:\Downloads  폴더에 복사 압축 해제
  3. Anaconda Prompt에서 ml-agents 디렉토리 내의 python 디렉토리로 변경
    • cd C:\Downloads\ml-agents\python
  4. 인터넷에 연결되어 있는 상태에서 Anaconda Prompt 입력
    • pip install


ML-Agents 툴킷을 실행하는 데 필요한 모든 Python 패키지의 설치가 완료
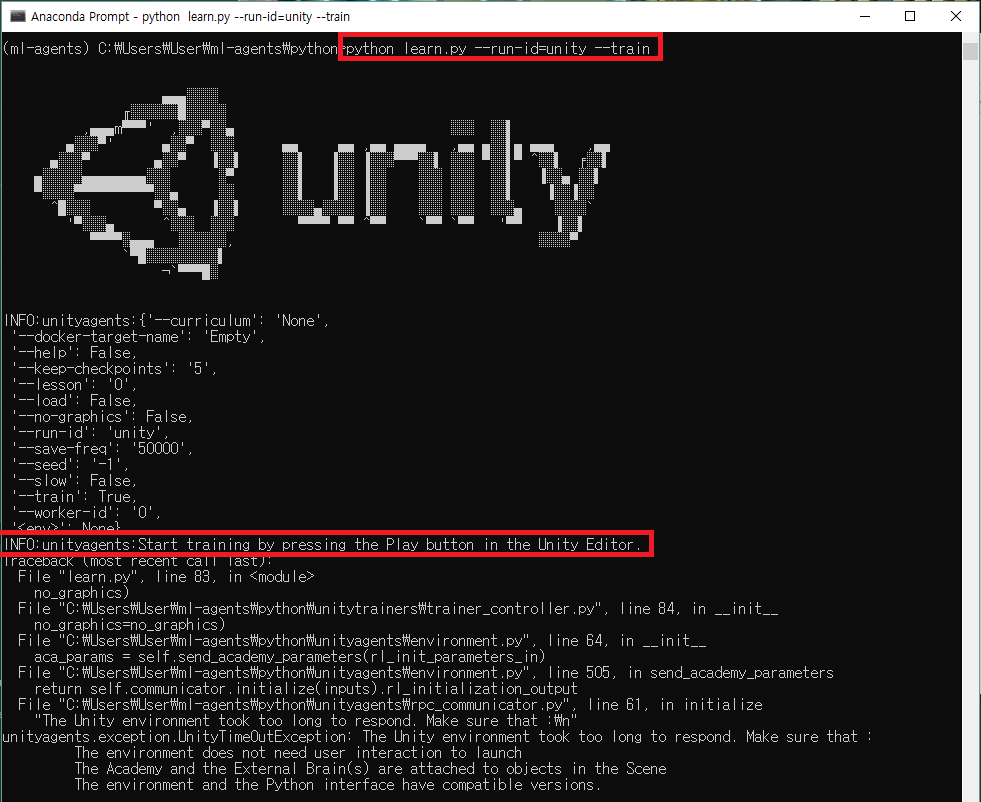

5. 실행

  1. Terminal창(Anaconda)에서 실행(python3 아님)
    • python learn.py --run-id=<run-identifier> --train
    • “Start training by pressing the Play button in the Unity Editor" 메시지  출력 후
  2.  Unity 에서 재생(Play) 버튼 클릭하면 ML-Agent와 Python이 통신하면서 모델(데이터)을 저장한다.


실행시 에러 모음

2018년 8월 17일 금요일

[Android] Nox Player가 Logcat과 연결이 안될때

Nox Player가 Logcat과 연결이 안될때가 많다.

아래내용를 Batch파일로 만들어서 사용하면 편한다.
txt파일 생성 -> 아래내용 입력 -> 확장자 bat로 수정


"C:\Program Files\Nox\bin\adb.exe" devices
"C:\Program Files\Nox\bin\adb.exe" connect 127.0.0.1:62001

다운로드

[Android] CMS 콘솔창으로 LogCat 보기


Batch파일을 이용해 CMS 콘솔창으로 LogCat 볼수있다.
txt파일 생성 -> 파일편집 -> 확장자를 bat로 수정

1. 모든 로그 보기
2. Unity 관련 로그 보기
3. Unity 에서 사용한 Debug.Log만 보기

@echo off
:Ask
echo LogCat을 선택하세요?(1, 2, 3)
echo 1. LogCat 모두 보이게
echo 2. Unity 관련 Log 다 보이게
echo 3. Unity에서 사용한 Log만 보이게
set INPUT=
set /P INPUT=LogCat Type input :
If %INPUT%==1 goto all
If %INPUT%==2 goto unityall
If %INPUT%==3 goto unltylog
:all
echo 1
C:\Users\%USERNAME%\AppData\Local\Android\Sdk\platform-tools\adb logcat
goto exit
:unityall
echo 2
C:\Users\%USERNAME%\AppData\Local\Android\Sdk\platform-tools\adb logcat -s Unity
goto exit
:unltylog
echo 3
C:\Users\%USERNAME%\AppData\Local\Android\Sdk\platform-tools\adb logcat Unity:I Native:I *:S
goto exit
:exit
@pause

2018년 8월 16일 목요일

[Unity Android] Unity 2018.2 GooglePlayGamesPlugin-0.9.50 Crash

Unity 2018.2버전으로 마이그래이션 후 playgameservices 로그인이 안되면서 Crash가 발생
- Google Play Games plugin for Unity 0.9.50 기준

Social.localUser.Authenticate 구글 플레이 게임 서비스 호출 -> Crash

Caused by: java.lang.IllegalStateException: A fatal developer error has occurred. Check the logs for further information.

구글 플레이 게임 서비스의 app_id의 읽는 구조가 2018.2에서 변경되었다.
Unity Android 빌드 시 AndroidManifest.xml 병합 과정에서 개행문자 인식 오류로 인해 App_ID부분을 인식 하지 못한다.


해결 방법

아래 파일을 열어 app_id 앞의 여백에 "u003"을 입력한다.
Assets/GooglePlayGames/Editor/template-AndroidManifest.txt

<meta-data android:name="com.google.android.gms.games.APP_ID"
            android:value="\ __APP_ID__" />

->

<meta-data android:name="com.google.android.gms.games.APP_ID"
            android:value="\u003__APP_ID__" />
Google Play Games - Android Configuration -> Setup


아래 파일 확인 (위에것 말고 아래것만 수정해도 된다.)
GooglePlayGames/Plugins/Android/GooglePlayGamesManifest.plugin/AndroidManifest.xml

<meta-data android:name="com.google.android.gms.games.APP_ID" android:value="\ 123456789" />

->

<meta-data android:name="com.google.android.gms.games.APP_ID" android:value="\u003123456789" />

Open found in 
  and replace all instances of "\ " (note the trailing space after the slash) with "\u003". Worked for me on 2018.2.1f1.


[Unity Android] GPGS & Firebase : GamesNativeSDK Can't Register class Error

Google Play Game Service & Firebase Error

실행 환경
play-games-plugin-for-unity-0.9.50
firebase_unity_sdk_5.2.0
  - FirebaseMessaging.unitypackage 설치

DEX64 및 여러 빌드 에러를 다 잡고 APK를 만들어 실행하였다.
게임 실행중 아래 에러가 발생 하며, Google Play Game Service에 로그인이 되지 않았다.
Asset/Plugins/Android폴더의 play-services-auth 버전확인 결과 사용 하려는 버전 보다 낮은 aar파일이 받아지는것을 확인하였다.
해당내용은 FireBase Plugin에서 Appdependencies.xml파일을 수정하면 된다.

Assets/FireBase/Editor/Appdependencies.xml
androidPackage com.google.android.gms:play-services-base 삭제
<!-- Copyright (C) 2018 Google Inc. All Rights Reserved.

FirebaseApp iOS and Android Dependencies.
-->

<dependencies>
  <iosPods>
    <iosPod name="Firebase/Core" version="5.4.0" minTargetSdk="8.0">
    </iosPod>
  </iosPods>
  <androidPackages>
      <!--  삭제
    <androidPackage spec="com.google.android.gms:play-services-base:15.0.1">
    </androidPackage>
    -->
    <androidPackage spec="com.google.firebase:firebase-common:16.0.0">
    </androidPackage>
    <androidPackage spec="com.google.firebase:firebase-core:16.0.1">
    </androidPackage>
    <androidPackage spec="com.google.firebase:firebase-app-unity:5.2.0">
      <repositories>
        <repository>Assets/Firebase/m2repository</repository>
      </repositories>
    </androidPackage>
  </androidPackages>
</dependencies>


androidPackage com.google.android.gms:play-services-base 삭제하면 Editor에서 aar파일을 15.0.1 버전으로 다시 받는다.


참고 링크
GPGS & Firebase : GamesNativeSDK Can't Register class Error #2230

Mixed dependency versions resolve incorrectly. #123

Does not bump pre-15 versions to 15+ #127

// 버그 해결책
Mixed Dependency Versions bugs 2.0 #130


2018년 8월 10일 금요일

[Unity Android] Failed to execute aapt

FireBase 작업중 갑자기 없던 에러가 발생
검색결과 다시 빌드 하라는 말만..

해결
라이브러리를 찾지 못해서 발생
Menu Asset -> Play Services Resolver -> Android Resolver를 다시 실행해서 라이브러리를 다시 받는다.


[Unity Android] Gradle Minify을 이용한 Dex 64k 참조 제한 해결 방법 정리

앞에 두번의 글을 적었는데 유니티의 더 좋은 기능이 있어서 다시 소개한다.
아직 실험단계(Experimental)의 기능이라서 그런지 설명이 없다...

발생 원인은 아래 링크 참고
https://developer.android.com/studio/build/multidex
두 오류 모두 공통 숫자인 65,536을 표시합니다. 이 숫자는 단일 DEX(Dalvik Executable) 바이트코드 파일 내에서 코드가 호출할 수 있는 참조의 총 개수를 나타냅니다. 이 페이지에서는 multidex라는 앱 구성을 활성화하여 이 제한을 넘는 방법을 설명합니다. multidex는 앱이 다중 DEX 파일을 빌드하고 읽을 수 있게 해줍니다.

64K 에러 메시지들
Conversion to Dalvik format failed:
Unable to execute dex: method ID not in [0, 0xffff]: 65536
trouble writing output:
Too many field references: 131000; max is 65536.
You may try using --multi-dex option.
Error:The number of method references in a .dex file cannot exceed 64K.
Error:Execution failed for task ':app:transformClassesWithDexForRelease'.

해결 방법
간단하다. 클릭 두번이면 끝...
  1. Build System -> Gradle 선택
  2. PlayerSettings -> Publishing Settings -> Minify -> Release/Debug -> Gradle(Experimental) 선택 (ProGuard를 선택해도 된다.)
끝...

AndroidManifest에 android:name="android.support.multidex.MultiDexApplication" 확인 후 삭제


다른 방법


2018년 8월 9일 목요일

[Unity Android] Gradle Build에서 FireBase 사용하기 google-services.json is missing

다른 테스트중 아래 내용이 다를수도 있다.


Unity에서 Gradle Build를 사용하여 FireBase를 추가할 경우 
아래 FireBase Android 문서를 보고 내용을 추가하면 여러~ 에러가 발생한다.
문서는 Android를 사용하는 방법이니... 
우리는 Unity!!! 문서 내용은 사용하지 않으며, 과감히 지운다.

delete
// classpath 'com.google.gms:google-services:4.0.1'
//implementation "com.google.firebase:firebase-core:16.0.1"

//implementation 'com.google.firebase:firebase-messaging:17.1.0'
// ADD THIS AT THE BOTTOM
//apply plugin: 'com.google.gms.google-services'


* What went wrong:
Execution failed for task ':processReleaseGoogleServices'.
> File google-services.json is missing. The Google Services Plugin cannot function without it.
   Searched Location:
  C:\WORKSPACE\kor\Temp\gradleOut\src\nullnull\release\google-services.json


[Unity Android] Gradle ProGuard을 이용한 Dex 64k 참조 제한 해결 방법 정리

글확인 전 아래링크부터 확인


Android 개발 빌드 64K 참조 제한 해결 방법에 대해 정리한다.(Unity 2018.2)

발생 원인은 아래 링크 참고
https://developer.android.com/studio/build/multidex
두 오류 모두 공통 숫자인 65,536을 표시합니다. 이 숫자는 단일 DEX(Dalvik Executable) 바이트코드 파일 내에서 코드가 호출할 수 있는 참조의 총 개수를 나타냅니다. 이 페이지에서는 multidex라는 앱 구성을 활성화하여 이 제한을 넘는 방법을 설명합니다. multidex는 앱이 다중 DEX 파일을 빌드하고 읽을 수 있게 해줍니다.

64K 에러 메시지들
Conversion to Dalvik format failed:
Unable to execute dex: method ID not in [0, 0xffff]: 65536
trouble writing output:
Too many field references: 131000; max is 65536.
You may try using --multi-dex option.
Error:The number of method references in a .dex file cannot exceed 64K.
Error:Execution failed for task ':app:transformClassesWithDexForRelease'.

해결 방법
64K 참조 제한의 해결 방법 아래 두가지가 있다
  1. Project  Export 후 Android Stdio에서 빌드
    1. https://developers.facebook.com/docs/audience-network/unity?locale=ko_KR
  1. mainTemplate.gradle
    1.  MultiDex 사용
      1. https://docs.toast.com/ko/Game/Gamebase/ko/unity-started/
    2. ProGuard를 이용한 방법
      1. https://developer.android.com/studio/build/shrink-code?hl=ko

1번 내용은 많기 때문에 유니티의 새로운 기능이며, 따로 Export하지 않아도 되는
2-2. ProGuard를 이용한 방법을 사용하겠다.

ProGuard를 사용하면 코드 난독화 / 최적화, 코드 축소를 통해 미사용 코드를 제거 하여 Dex64K를 해결 할 수 있다.


Custom Gradle template 사용
  1.  Build System -> Gradle 선택
  2.  mainTemplate.gradle 설정
  3.  Custom Gradle Template 설정
PlayerSettings -> Publishing Settings -> Build / Custom Gradle Template 체크 -> User Proguard File 체크


Plugins/Android폴더 아래 mainTemplate.gradle / proguard-user File 파일이 생긴다.


3. mainTemplate.gradle 파일


// GENERATED BY UNITY. REMOVE THIS COMMENT TO PREVENT OVERWRITING WHEN EXPORTING AGAIN
buildscript {
    repositories {
        jcenter()
    }

    dependencies {
        classpath 'com.android.tools.build:gradle:3.0.0'
    }
}

allprojects {
   repositories {
      flatDir {
        dirs 'libs'
      }
   }
}

apply plugin: 'com.android.application'

dependencies {
    compile fileTree(dir: 'libs', include: ['*.jar'])
**DEPS**}

android {
    compileSdkVersion **APIVERSION**
    buildToolsVersion '**BUILDTOOLS**'

    defaultConfig {
        minSdkVersion    **MINSDKVERSION**
        targetSdkVersion **TARGETSDKVERSION**
        applicationId '**APPLICATIONID**'
        multiDexEnabled true
        ndk {
            abiFilters **ABIFILTERS**
        }
        versionCode    **VERSIONCODE**
        versionName    '**VERSIONNAME**'
    }

    lintOptions {
        abortOnError false
    }

    aaptOptions {
        noCompress '.unity3d', '.ress', '.resource', '.obb'**STREAMING_ASSETS**
    }

**SIGN**
    buildTypes {
          debug {
            minifyEnabled **MINIFY_DEBUG**
            useProguard **PROGUARD_DEBUG**
            proguardFiles getDefaultProguardFile('proguard-android.txt'), 'proguard-unity.txt'**USER_PROGUARD**
              jniDebuggable true
          }
          release {
            minifyEnabled **MINIFY_RELEASE**
            useProguard **PROGUARD_RELEASE**
            proguardFiles getDefaultProguardFile('proguard-android.txt'), 'proguard-unity.txt'**USER_PROGUARD**
              **SIGNCONFIG**
          }
    }
**PACKAGING_OPTIONS**
}


**SOURCE_BUILD_SETUP**

4.proguard-user 파일

예제

# Begin: Debug ProGuard rules
-dontobfuscate

-keepattributes SoureFile,LineNumberTable

# End: Debug ProGuard rules

난독화 옵션
  • dontwarn 패키지명.** : 지정해서 경고 무시
  • keep class 패키지명.** : 난독화가 필요하지 않은 경우
         keep class com.example.classname : ClassNotFoundException에러나 난독화를 진행하지 않고 유지하는 옵션
  • ignorewarnings : 경고 무시
  • dontoptimize : 최적화 하지 않기
  • dontshrink : 사용하지 않는 메소드 유지
  • keepclassmembers : 특정 클래스 멤버 원상태 유지
        keepclassmembers class com.example.classname { 접근제어자 *; } : 특정 클래스의 맴버 원상태 유지
  • keepattributes : 내부 클래스 원상태 유지 적용
        keepattributes InnerClasses # 내부클래스 원상태 유지 적용

자세한 내용은 아래 링크 참조